What I do


A world of paper art and techniques: Origami, Gift boxes, Gift cards, Paper Jewellery, Marbled papers, Paste papers, Printed papers, Stamping, Itajime - Shibori, Suminagashi, Collage papers, Batiks, Recycling Basketry, Stenciling.

Note to readers and visitors

All images, texts and any other content shown on this blog is COPYRIGHT MATERIAL. The use of them for any purpose, modifying them or not, in a complete or partial way, is forbidden. If you want to use them elsewhere, please ask about it to my person by e-mail.

mercoledì 31 agosto 2011

Boxes and Containers

Dear readers, today I want to share with you a work I made a couple of years ago... Yesterday I was finding into my old archive pictures and I've found pics of 4 boxes I made for a commissioned work. The boxes were made with beautiful vintage printed papers that I bought in a paper store near home in Naples City. When I found the store I was really astonished due the big assortment of papers, printed, glossy, embroided, silky, and many other kinds... For a papercrafter this kind of shop is a paradise! Among the papers I've found, there was one hand painted!! It is the turquoise one with silver patterns and with it I made a crane (tsuru) container for a wedding gift... This is my second passion: Origami.


domenica 28 agosto 2011

Marbling Flowers...

In my opinion, the marbling of flowered patterns is a difficult task because, among other aspects, there is a compromise between the number of colors used and the form in which they spread  when they are in contact on size surface; especially when those floral motifs are made on a Gel Git base. It is important to determine the amount of ox gall you need to use with each color you add... the more colors you add, the most drops of ox gall you need... Then be patient, and first of all do the "drop test" to reach the better way to do your work.. Here I show you some of my tries.


martedì 23 agosto 2011

Classifying Paste Papers

In every work one does, manytimes it's important to know the variations or styles. It helps to understand what one is doing and in this way your learning is enriched. This is also a good chance to know the history and beauty of art you are doing. It is a step on your formation, a way of culture.

Paste Papers have a lot of styles, each one was developed in specific periods of bookbinding history. The book "Decorated Book Papers" has a very comprehensive classification of these papers, and today I want to share with you a little resume of them, only indicating a branching scheme I've done during my lecture of the topic.


lunedì 22 agosto 2011

Pasted Poetry...


Pasting in blue.

Everyone always likes a bit of blue to decorate the workplace. Many times, when time permits, the feeling of seeing the sky from work is a pleasure that is manifested in all cultures.

Blue is a cool color, soothing and is associated with the mind, the most intellectual part of the mind.

The blue represents the night.
The sea blue makes us feel relaxed and calm, like the vast, dark sea at night.

The blue sky and clear blue,
make us feel calm and secure from all the noise and the day's activities, it is also recommended for insomnia.

The dark midnight blue,
has a strong sedative effect on the mind, allowing us to connect with our intuitive sense. Too much dark blue can cause depression.

The blue helps control the mind, to have clear ideas and be creative.

The color blue is associated with Pisces, Libra, Aquarius and Sagittarius.

Blue color Keywords: stability, depth, loyalty, confidence, wisdom, intelligence, faith, truth, eternity. Sea blue: knowledge, mental integrity, power, seriously. Light Blue: generosity, health, healing, cool, understanding, peace.


venerdì 19 agosto 2011

Some Marbled Papers.

Some marbled papers that I made during my own learning...


Marbling Combed Patterns.

Continuing with the practice of marbling, today I show you combed patterns. In each one I used three colors, beginning with stone pattern and inmediately I've done lines in vertical way... This is one of the easiest patterns to draw and can be made in various ways, depending on the appearence you want. I made them using a wood stick to draw the vertical lines, but in the most cases, this pattern is made using combs, with various teeth separations, to achieve better straight and parallel lines.


giovedì 18 agosto 2011

Marbling French Curl or Snail pattern.

French Curl or Snail is a marble pattern that has been used for endpapers, particularly in France, since about 1660. It can be recognized by the many spirals in its pattern. The curls can either be formed one at time with a stick or in groups, in this case can be used a wooden frame constructed in the form of a small harrow, each parallel bar being set with as many tapering wooden pegs as there are curls required on the sheet to be marbled. The difficulty in executing this pattern is to "catch" the curls before they lose their shape.

Many fine armorial bindings have the large red and blue pattern as linings. Padeloup and Derome both used this pattern for endpapers in books they bound for the French nobility. The French curl pattern remained popular, and continued to be used in Europe and England until about 1870. While it was highly valued for endpapers, it was rarely, if ever, used for cover papers on 17th and 18th century books.

The three examples I show here, are related to curls made individually with a wood stick.


mercoledì 17 agosto 2011

Marbling Nonpareil and Cascades.

As an example on how Gel Git pattern is a base to do other patterns in marbling technique, here I want show you two cases: Nonpareil and Cascade patterns. They are examples of the use of combs, and by this reason these patterns can be classified also as combed ones. Basically the difference between Nonpareil and Cascade is that the first is done with a narrow teeth comb and the second one with a wider comb.

Traditional combed marbleized papers, in accordance with old recipes, are usually made with four or five colors. The colors are applied unevenly in alternation until the surface of the size is saturated with colors. Be careful to use even and slow movements so that no waves arise on the size and the colors do not get mixed up.

The Nonpareil marble represents a revival of the early comb pattern. It came into use in about 1838 and was used throughout the middle of the 19th century for endpapers and later for cover papers on all classes of stationery bindings. It was also used for edge marbling from about 1840 to the 1920s when edge marbling virtually went out of existence. Nonpareil marbles were less artistic than the earlier combs, and, although executed by hand, suffered from a sort of mechanical appearance.

Here, the first picture is a Cascade pattern and the other three are Nonpareil.


martedì 16 agosto 2011

Marbling Gel Git Patterns

In marbling technique, The Gel Git pattern is hardly ever printed by itself; but it is a very important preliminary stage that has to be made on the way to producing lots of other patterns.  Practically every combed pattern starts out as a Gel Git, or should.  Sometimes you will hear it referred to as a Git Gel, even in books. The translation of the term refers "To and Fro - Come and Go", remembering the movements done to get the pattern. It is also named Zig Zag pattern. It can be made in various directions of the paper. Here you are three examples of it.


lunedì 15 agosto 2011

Wood


Wood
Created by Salvatore Valentino
Arte TaToRiGaTo
 

Butterflies and Snails.


Butterflies and Nymphs 
Created by Salvatore Valentino
Arte TaToRiGaTo


Snails Under the Rain 
Created by Salvatore Valentino
Arte TaToRiGaTo

Casualities are good.

Sometimes when one is working on doing Paste Papers, one can find that casualities produce better results than those who one have planned in the final work...This model I present to you today was done absolutely by casual things... It appears like metal rings are holding fibers...
 
Well this result I've obtained after covered the paper with pink paste, then with a medium brush I put green paste, obtaining in this way a brown-grey color with matices of pink and green... Finally with a comb I've done the arcs, but I do not wanted to do them exactly as they resulted (my original idea was to do ondulated lines), by the way finally I decided to not discard the work, and put it to dry... a few moment later I returned to understand better the result and only then I noticed the effect of rings holding fibers... Hope you enjoy this paper...


Holding Fibers
Created by Salvatore Valentino
Arte TaToRiGaTo 

Decorated Book Papers

En estos dias me ha llegado el segundo libro que habla sobre la Señora Rosamond Loring...

These days I have received the second book about Mrs. Rosamond Loring ...


Decorated Book Papers
by Rosamond B. Loring (Fourth Edition)
Houghton Library
Harvard College Library


Este es un libro que, junto con el primero ya reseñado en este blog (primer libro), es infaltable en la biblioteca de un hacedor de papeles decorados. En su primera parte, diferentes autores como Walter Muir Whitehill, Dard Hunter, Philip Hofer, Hope Mayo y Veronica Ruzicka, nos muestran una excelente y completa biografia de la Señora Rosamond Loring en las diversas facetas de su vida: Su posicion en el estudio y elaboracion de papeles decorados, su vida como maestra y artista,  como hacedora, coleccionista e historiadora de papeles decorados. Se presenta tambien una extensa bibliografia donde se reseñan los libros historicos confeccionados con los papeles realizados por la Señora Loring.

This is a book that, along with the first already mentioned in this blog (first book) is a MUST in the library of a maker of decorated papers. In the first part, different authors as Walter Muir Whitehill, Dard Hunter, Philip Hofer, Hope Mayo and Veronica Ruzicka, show us an excellent and comprehensive biography of Mrs. Rosamond Loring in various facets of her life: Her position in the study and decorated paper-making, her life as a teacher and artist, as a maker, collector and historian of decorated papers. It also presents an extensive bibliography which traces the historical books bounded ​​with papers made ​​by Mrs. Loring.

La segunda parte del libro muestra una extensa y muy interesante explicacion de los diferentes tipos de papeles decorados usados para encuadernacion de libros. Se nos habla de los primeros papeles para guardas, la historia del marmolado, papeles marmolados para guardas, papeles impresos, los papeles Dutch Gilt o Floreados, papeles al engrudo para guardas, algunos famosos papeles de guardas del siglo XIX, papeles de guardas de autor, y papeles de guardas pictoricos. Para cada uno se presenta una explicacion bien detallada de lo que significa cada uno de ellos, su elaboracion, sus particularidades y su uso.

The second part of the book shows an extensive and very interesting explanation of the different types of decorated papers used for book binding. It is told to us about early end-papers, the history of marbling, marbled end-papers, printed end-papers, Dutch Gilt or Dutch Flowered end-papers, paste end-papers, some famous Nineteenth-Century end-papers, publisher's end-papers and pictorial end-papers. For each one it is presented a very detailed explanation of  their elaboration, their characteristics and uses.

El libro presenta tres apendices donde se explica maravillosamente el arte del marmoleado y de la preparacion de los papeles al engrudo, tal como lo hacia la Señora Loring, brindando de esta forma un regalo invaluable para todos los que queremos adentrarnos, estudiar y aprender este arte. El tercer apendice se refiere a una vasta lista de antiguos elaboradores de papeles decorados, en orden alfabetico de acuerdo con las ciudades donde trabajaban.

The book has three appendices which beautifully explains the art of marbling and the preparation of paste papers, in the way Mrs. Loring used to make them, giving a priceless gift for all us that want to begin, study and learn this art . The third appendix refers to a long list of early makers of decorated papers, arranged in alphabetical order according to the cities in which they worked.

Como clausura del libro, podemos deleitarnos con muestras de pagina entera, de una amplia serie de papeles decorados antiguos, pertenecientes a la Señora Loring. Verdaderamente un libro joya, que nos inspira y nos nutre, tecnica y artisticamente, y sobre todo nos lleva a la epoca de la Señora Loring, poniendonos en primera fila junto a ella en sus momentos de creatividad.

As a closure of the book, we can delight with full-page samples of a wide range of antique decorated papers belonging to Mrs. Loring. Truly a gem book that inspires and feeds us, technically and artistically, and transport us to the time of Mrs. Loring, putting us and she toghether in her moments of creativity.

domenica 14 agosto 2011

Multicolor Samples of Paste Papers

Hoy quiero mostrarles tres ejemplos del uso de la tecnica multicolor con el engrudo, para crear efectos inusuales y contemporaneos con los Papeles al Engrudo... Las alternativas son infinitas!. Lo que solo deben hacer es jugar!. Algunos de estos modelos  son mis intentos de reproducir trabajos hechos por otros artistas del papel al engrudo, solo como practica para ver como funciona la tecnica...

Today I show you three examples of using multicolor techniques with paste, to create unusual and contemporary efffects with Paste Papers... The choices are infinite! What you have to do is only play! Some of these models are my tries to reproduce works made by other paste papers artists, just as practice to see how the technique works...


sabato 13 agosto 2011

Hiroshima and Nagasaki

Last 6th and 9th August was the Memory of Atomic Bombs blasted on Hiroshima and Nagasaki cities of Japan, during the Second World War. I wanted to express some feelings about it, and I've done this two paste papers...


Hiroshima
Created by Salvatore Valentino 
Arte TaToRiGaTo


Nagasaki
Created by Salvatore Valentino 
Arte TaToRiGaTo

Brown Fantasy

Hoy les quiero mostrar como podemos jugar con solo 2 instrumentos (un peine y una pinza de ropas). Usando un color de primer plano (marron en diferentes tonos) y algunos colores de fondo contrastantes. Todos los movimientos fueron hechos en forma aleatoria...

Today I want show you how we can play with only 2 instruments (a comb and a half clothes peg). Using one first plane color (brown in different tones) and some contrasting background colors. All movements were done freely without a specific sequence...


venerdì 12 agosto 2011

Blog Update - Actualizacion del Blog

Dear followers, I've updated the blog adding three Photo Albums of Paste Papers I've made. You can see them clicking on the link "Paste Papers Photo Albums" placed on the right sidebar of the blog, in the Pages section. Enjoy it and leave your comments.

****************
Estimad@s lector@s, he actualizado el blog añadiendo tres albums de fotos de Papeles al Engrudo que he realizado. Ustedes pueden verlos haciendo click sobre el link "Paste Papers Photo Albums" que se encuentra en la parte derecha del blog, en la seccion Paginas. Disfrutenlos y dejen sus comentarios.

giovedì 4 agosto 2011

Regreso pronto

Estimados lectores, a partir de hoy 4 de agosto y hasta el 11 estare de viaje... por tanto a mi regreso pondre nuevas entradas al blog, para seguir compartiendo con ustedes... Les deseo a todos una muy feliz semana que termina y nos vemos al regreso. Animense a practicar y experimentar pintando papeles!!

Un excelente libro - An Excellent book

Hoy quiero compartir con ustedes una reseña de un libro que no puede faltar en la biblioteca de un artista del papel. Se trata de:

Today I want to share with you a review of a book that must be present in the library of a paper artist. It is:

MARBLED AND PASTE PAPERS
Rosamond Loring's Recipe Book
de la: HOUGHTON LIBRARY 
         HARVARD COLLEGE LIBRARY 
         2007


Rosamond Loring (1889-1950) fue una coleccionista, historiadora, encuadernadora y decoradora de papeles. Su coleccion de papeles abarca aproximadamente 10000 (diez mil) ejemplares de papel marmolado, al engrudo e impresos, de caracter historico y contemporaneo. Su entera coleccion fue donada por la familia Loring en 1952, al Departamento de Imprenta y Artes Graficas, de la Houghton Library de la Universidad de Harvard.

Rosamond Loring (1889-1950) was a collector, historian, binder, and paper decorator. Her collection of papers covers approximately 10000 (ten thousand)  of marbled, paste, printed and historical and contemporary papers. Her entire collection was donated by the Loring family in 1952, to the Department of Printing and Graphic Arts, Houghton Library of Harvard University.

En este libro se presenta una recopilacion manuscrita (faxsimil de los apuntes originales) de recetas, para elaboracion de papeles marmolados y al engrudo, que comprende sus ensayos y experiencias en la preparacion de los soportes para las pinturas, preparacion de los colores y diversos aditivos, preparacion del engrudo, tecnicas de marmolado, etc. El manuscrito es datado marzo 1928, y para facilitar la lectura del mismo, al final del libro se presenta una transcripcion de este.

This book presents a compilation of a manuscript (a faxsimile of the original notes) recipe for marbled and paste paper making, which includes essays and experiences in the preparation of the supports for the paintings, preparation of colors and various additives , preparation of paste, marbling techniques, etc. The manuscript is dated March 1928, and to facilitate the reading, at the end of the book there is a transcription of it.

En mi experiencia personal es un libro que permite tener una muy buena base para la tecnica de marmolado principalmente, ya que la mayoria de las recetas presentadas son para este tipo de proceso. Es importante tomar en consideracion que el contenido es relacionado con la experiencia personal de la Señora Loring, y que sus recetas no siempre nos van a funcionar, porque variables como calidad del agua, tipos de pigmentos, materiales densificantes, etc, varian de lugar en lugar y de dia en dia, por tanto, su seguimiento no exime de la fase de experimentacion con nuestros propios materiales.

In my personal experience this is a book that allows a very good basis for the technique of marbling mainly, because most of the recipes are for this type of process. It is important to take into consideration that the content is related to the personal experience of Mrs. Loring, and her recipes will not always work if we follow them, because variables such as water quality, types of pigments, weighting materials, etc, vary from place to place and from day to day, therefore, does not release its follow-up phase of experimentation with our own materials.

Para los que deseen ver algunos de los papeles elaborados por Rosamond Loring pertenecientes a su coleccion, pueden visitar los siguientes links:

For those who wish to see some of the papers created by Rosamond Loring, belonging to the collection, visit the following links:
        

mercoledì 3 agosto 2011

Post elaboracion del Papel Pintado - Post treatment of Painted Papers

Una vez que hemos elaborado nuestro diseño sobre el papel al engrudo, procedemos a llevarlo a la etapa de secado. Por lo general el papel se puede poner a secar sobre pliegos de papel periodico o de papel para empacar. Yo he probado este metodo pero la verdad que no me ha gustado debido a que una vez secos, los papeles tienden a pegarse sobre el soporte, porque tienen engrudo que se pasa a la parte trasera de la hoja, por los bordes de la misma... Una vez pegados, sera una odisea el quitarle el papel periodico por detras, por no decir casi imposible.

Once we have done our design on paste paper, we proceed to take it to the drying step. Usually the paper can be put to dry on sheets of newsprint or packing paper. I've tried this method but I really do not like it because once dried, the papers tend to stick to the support because some paste passed to the back of the sheet, down the borders... Once attached, it will be an odyssey to separate them.

Por ello decido ponerlos a secar sobre los tendederos de ropa. Ahora bien, aqui se pueden poner a secar colgandolos a la mitad de hoja sobre la cuerda del tendedero (pero sin usar pinzas), y en este aspecto hay que tener cuidado con dos cosas, la primera es que las mitades del mismo papel colgado no se toquen entre si, porque seria imposible despegarlos y se arruinaria todo el trabajo; lo segundo es que las hojas colgadas deben estar lo mas separadas posible para que los diseños no se aruinen por contacto entre las hojas (recuerden que el engrudo esta humedo, y basta un toque sobre el diseño para arruinar su belleza)...
 
So I decide to put them to dry on clotheslines. Now, here they can be put out to dry hanging half sheet on the rope line (but without using tweezers), and here we must be careful with two things, first, that the halves of the paper itself does not hang touch each other, because it would be impossible to unstick and  all the work will be ruined, the second is that the sheets should be hung as far apart as possible so that the patterns do not ruin by contact between the sheets (remember the paste is wet, and just a touch on the pattern to ruin their beauty) ...

Por lo general el engrudo es lo suficientemente espeso y la carga colocada en la hoja es tal que no deberian haber problemas de escurrimiento si los colgamos en forma vertical... Particularmente yo prefiero ponerlos a secar en forma horizontal y sobre los tendederos (esos que son para dentro de la casa)... He visto que la ventaja de hacerlo asi es que los papeles no se pegan y el papel recibe ventilacion por ambas caras, facilitando de este modo el secado...

Usually the paste is thick enough and the load placed on the sheet is such that they should not have runoff problems if hung vertically ... Particularly I prefer them to dry horizontally and on clotheslines (those for indoors) ... I have seen the advantage of doing so is that the sheets do not stick and the paper receives ventilation on both sides, thereby facilitating the drying ...

Yo coloco a secar los papeles en un lugar ventilado (pero evitando corrientes fuertes de aire , para que no salgan volando los papeles y se arruinen), y en forma que no le incida la luz solar en forma directa... Cuando los papeles estan humedos y los colocamos a la luz directa del sol, secan muy rapido y el calor hace que las fibras del papel se encojan de una forma violenta produciendo un papel muy arrugado, que aunque lo planchemos costara retornarlo a su condicion lisa...

I put the papers in a dry ventilated palce(but avoid strong currents of air, not to fly off the papers and ruin them), and in a manner that does not impinge sunlight directly ... When the papers are wet and put them to direct sunlight, they dry very fast and the heat causes the paper fibers to shrink violently producing a wrinkled paper, although we iron them, it will be difficult to smooth them again...

Una vez bien secos los papeles, procedo a plancharlos colocandolos entre dos paños de algodon, blancos y limpios (que los uso exclusivamente para ello)... La plancha la pongo por lo general en la temperatura para planchar el lino... Es muy importante recordar que el planchado jamas se hara con vapor!!...

Once the papers are very well dried, I proceed to iron them between two cotton fabrics, white and clean (that I use exclusively for that) ... The iron temperature is usually for ironing linen fabrics ... It is important to remember that We will never iron with steam!!...

Al acabar con el planchado procedo a apilar los pliegos por lotes y colocarles peso encima, usando cartones de proteccion... este peso lo mantengo por una semana y al final el papel retoma su forma lisa, como si nunca hubiese pasado  por un proceso de humidificacion y secado.

At the end of the ironing I proceed to stack the sheets in batches and place weight on top, using cardboard for protection ... I maintain this weight for a week and eventually the smooth form  reprises as if sheets never passed by a process of wetting and drying.

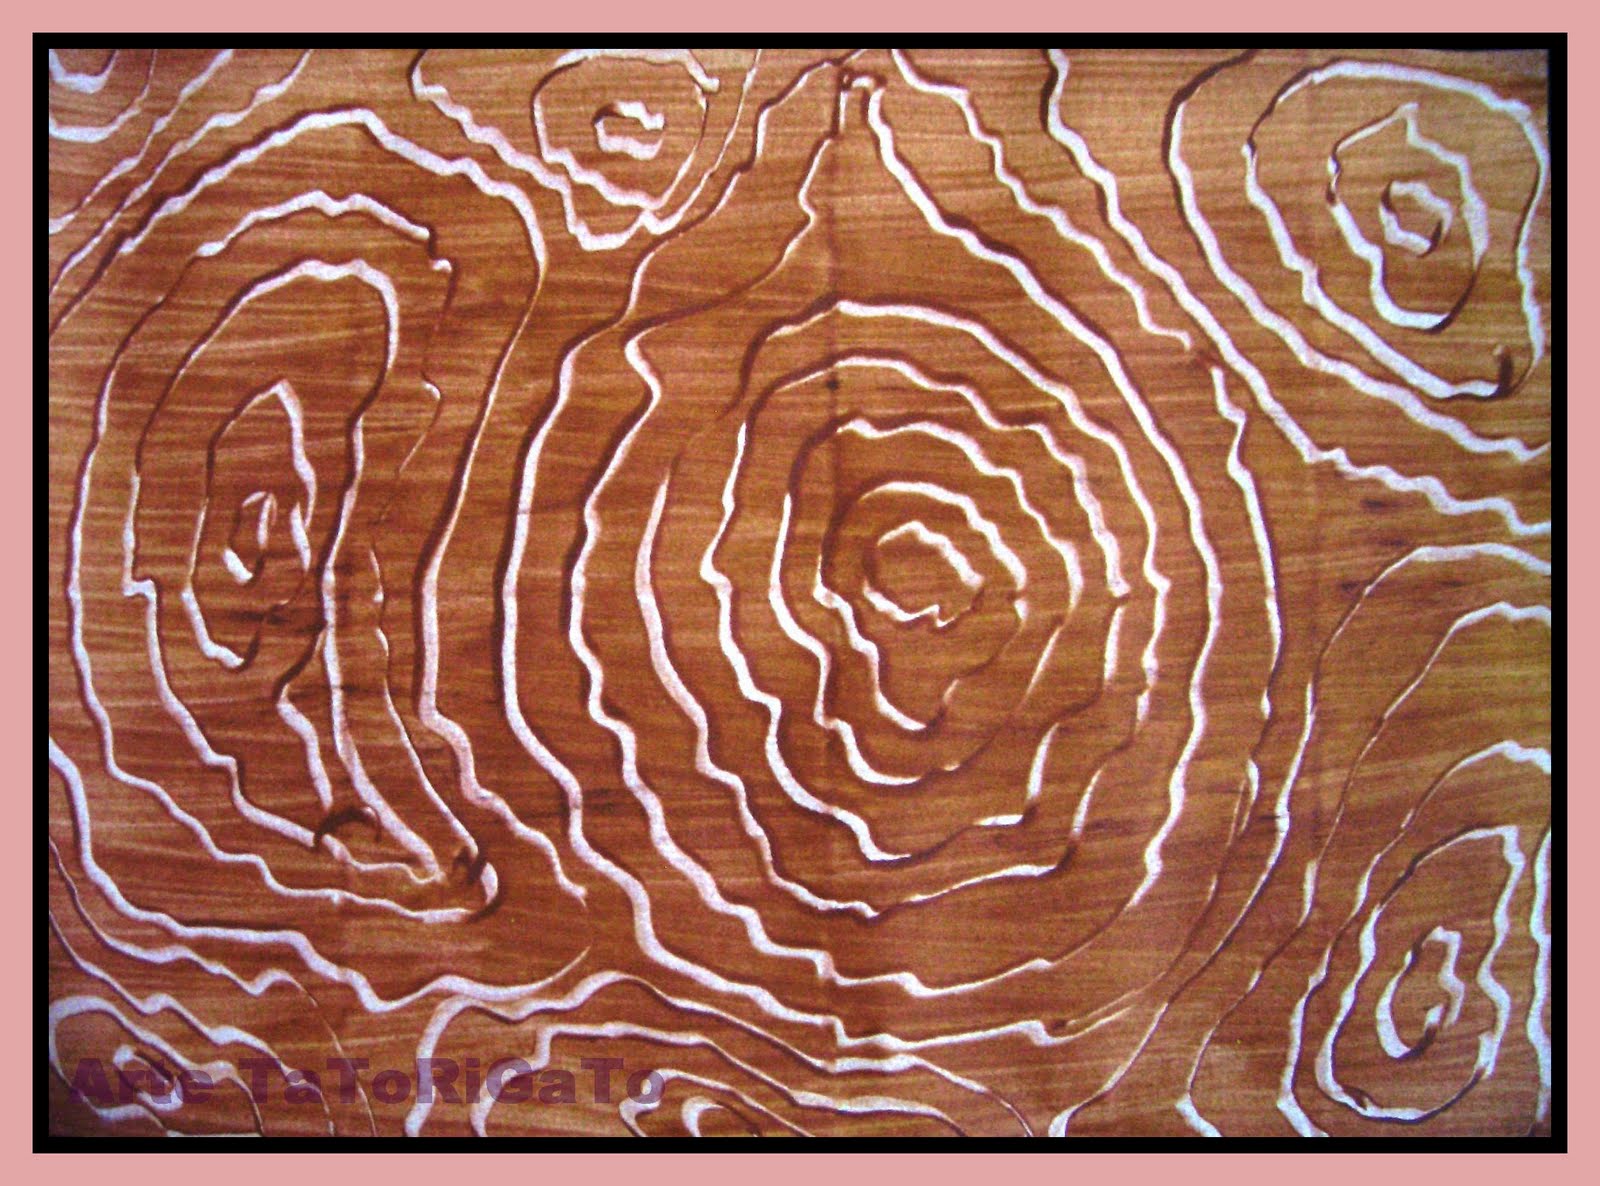
Dependiendo de las aplicaciones del papel, podremos realizarles un postratamiento bien sea con un barniz sellador de los que se usan para proteger los cuadros artisticos contra el polvo, esto le dara ademas cierto brillo, o mucho mejor aun, pasarles cera de abeja para crear una capa protectora que a la vez le dara una textura mas lisa...

Depending on the applications of the paper, we can do a post-treatment with a gloss sealer that is used to protect artistic pictures against dust, plus this will give some glitter, or better yet, pass beeswax to create a protective layer which will give the paste paper a smoother texture ...

A mi me gusta que se sienta la textura, para mi eso es muy valioso como calidad artesanal del trabajo, pero todo depende de los gustos...

I like to feel the texture, for me it is very valuable as handmade quality of work, but it depends on what want everyone ...

Despues de todo este set de explicaciones generales, es hora de ir mostrando y escribiendo sobre algunos trabajos seleccionados. Invito a todos los lectores a dejar sus comentarios e inquietudes que con beneplacito me dedicare a responderles!!!...

After all this set of general explanations, it's time for showing and writing about some selected works. I invite all readers to leave comments and concerns that I will answer greatfully!!...

Utensilios para el Diseño de Papeles al Engrudo - Instruments for Paste Paper Patterns

Bien, lo otro que necesitamos establecer es que utensilios usar para poder hacer los diseños y calcos sobre el papel, una vez que le hemos colocado los colores deseados... Por mi parte tengo apenas dos peines que compre, pero me quedaron muy cortos para los diseños que tengo pensado, por tanto, decidi crear yo mismo mis propios peines... muy sencillo con carton duro... los peines los elaboro segun sea el caso, con dientes de diferentes tamaños y separaciones. Cuando los preparo, pienso y hago trazos sobre los efectos que quiero lograr con ellos y alli establezco como cortarlos, de nuevo la creatividad aparece!...

Well, the other thing we need to establish is what instruments use to make designs and rubbings on paper, once you have placed the desired colors ... For my part I have bought just two combs, but they were very poor for the designs I have in mind, therefore, I decided to create my own combs myself... It's easy with cardboard ... I elaborate combs as I need them, with teeth of different sizes and separations. During the preparation, I think about patterns and the effects I want to accomplish with them and then i proceed cutting, creativity appears again! ...

Tambien podemos utilizar sellos de diferentes formas y tamaños, todo dependera de lo que queramos obtener en nuestro papel. Pueden usarse superficies con texturas, por ejemplo, esponjas, placas metalicas con relieves, trozos de madera con relieves, ganchos o pinzas de ropa, y una infinidad de cosas que podemos conseguir metiendo las narices en la cocina, o en el atico de la casa, entre los juguetes y cosas viejas u olvidadas... muchas veces nos sorprendemos por lo que podemos conseguir y nos damos cuenta que a partir de ese momento se convierten en nuestros tesoros mas preciados!!

We may also use seals of different shapes and sizes, all depends on what we get in our pattern. Textured surfaces can be used, for example, sponges, metal plaques with reliefs, wood reliefs, hooks or pegs, and a myriad of things we can get sticking our noses in the kitchen or in the attic of the house between toys and old or forgotten things  ... often we are surprised by what we get and we realize that from that moment become our most precious treasures!

Usen cosas que tengan diferentes formas y texturas... encontraran una versatilidad increible!! La mayoria de ellas solas no hacen o significan nada, somos nosotros los que le damos valiosa utilidad con nuestra mente y nuestra creacion artistica!!

Use things with different shapes and textures ... You will find incredible versatility! Most of them alone will not do or mean anything, we will bi who give them a valuable utility with our minds and artistic creation!

Preparacion del Engrudo

Bueno amig@s el proximo paso en la elaboracion de los papeles al engrudo, es justamente: "Preparar el Engrudo"...

Hay muchas formas de prepararlo, casi todos desde la infancia hemos preparado alguna vez engrudo para las labores escolares, pues bien estamos hablando de eso mismo. Los ingredientes basicos para su elaboracion son una clase de harina o fecula y agua... Se puede usar harina de trigo, harina de arroz, fecula de papas... Yo de momento he probado con la harina de trigo. Me gusta porque aunque da un color final mate, no lo altera y la superficie del papel queda con cierta "aspereza" que me agrada como distincion de un papel pintado en forma artesanal y no estampado en tipografia ni cosas por el estilo... Algunas personas del area dicen que utilizando una harina de arroz se obtiene un efecto mas brillante en los colores, pero la verdad es que este efecto depende entre otras cosas del tipo de color que estemos utilizando (acrilico, tempera, gouaches)... siempre colores a base acuosa para que se puedan mezclar bien con nuestro engrudo. En mi caso me gusta utilizar las temperas y los acrilicos en algunos casos... El problema con los acrilicos es que secan rapido, al menos mucho mas rapido que las temperas.
Un elemento muy bueno es la fecula de papas, con ella se obtiene una textura mas suave y un color resaltado. He visto trabajos de una amiga alemana que usa la fecula de papas y tienen un aspecto realmente hermoso.

En terminos de la preparacion del engrudo hay quienes lo prepaRan en frio, y otros en caliente, la diferencia es que en frio agregan la harina al agua fria y luego de disolverla calientan... en caliente, la harina la agregan al agua ya caliente... A mi una amiga me enseño un modo mas cercano al caliente para prepararlo (Este procedimiento esta pensado para la harina de trigo):

 ENGRUDO

Primero: En un vaso con agua fria disolvemos la harina de trigo, hasta que no formen grumos.

Segundo: Ponemos a calentar agua, cuando hierva, le agregamos el contenido del vaso, removiendo constantemente, hasta que vuelva a hervir, y dejamos hervir por 1 minuto mas.

Tercero: Apagamos el fuego y añadimos un poco de vinagre blanco.

Cuarto: Dejamos enfriar bien (a temperatura ambiente).

Quinto: Antes de colocarle el color, el engrudo se pasa por un colador.

NOTAS: Aqui se pueden manejar diferentes variables... por ejemplo una importante es la consistencia del engrudo. La que yo uso es que cuando lo pongo entre los dedos y los separo, me forma un hilo que se rompe cuando llega al centimetro o poquito mas. Hay otras prsonas que lo hacen mas o menos denso, eso dependera de los resultados a obtener (hay que experimentar)... Otra cosa, es el modo de calentar, yo lo hago directo, pero hay perosnas que prefieren el baño maria para evitar que se pegue a la cacerola, lo cierto es que esta preparacion requiere que se revuelva a cada rato; no lo vayan a poner al fuego y luego se van a hacer otras cosas, porque los tiempos son cortos y basta un momento de desatencion para arruinar todo y volver a empezar... En promedio el proceso de preparacion dura unos 20 minutos. El vinagre se le agrega como conservante natural, y esto tambien varia dependiendo de la aplicacion que le van a dar al papel... Por ejemplo si sus papeles deben ser para archivar por varios años, diria yo que hasta les convendria no usar harina de trigo, ni vinagre, porque con los años los acaros acabaran comiendose el papel mas rapido... En ese caso deberian utlizar la Metilcelulosa (pegamento para papel tapiz) de excelente calidad... lo malo es que es un producto sintetico y pues eso en mi concepto de la produccion biologica no me gusta mucho... Atencion, en ese caso el modo de preparacion difiere del de la harina aqui expuesto.


COLOR

Para preparar el color procedemos asi:

Primero: Preparamos un recipiente para cada color.

Segundo: Ponemos el engrudo, un poco de pegamento blanco (cola vinilica), y la pintura.

Tercero: Revolvemos el todo en el recipiente hasta que el color homogeinice en toda la mezcla.

NOTAS: La cola vinilica la usamos, para dos cosas, aderencia al papel y como conservante de la mezcla. Hay perosnas que en esta fase agregan una proporcion de barniz sellador, cuando usan pinturas acrilicas, segun, es para dar mas brillo a los colores... esto a mi no me resulta, por tanto no lo uso para nada. Una vez que la preparo doy rienda suelta a la creatividad por tres dias completos de diversion. La mezcla asi se puede conservar hasta por una semana en el refrigerado, yo nunca lo he probado... He hecho papeles en el verano con temperaturas de 38°C y en tres dias la gasto, y la mantengo fuera del refrigerador... prueben a ver...

Estas indicaciones son orientativas y pueden utilizarlas,como punto de partida y variar cosas, hasta que con la practica cada uno pueda conseguir su punto ideal.


A DIVERTIRSE...!!!

Inicio del cuento

Bien... por fin me decidi! Tengo que agradecer a algunas personas que me han dado animos de escribir este pequeño blog sobre un poco del arte que realizo. Gracias a mi amiga Lupita de Mexico y a mi amiga Elsje de Holanda! Mujeres ferreas y emprendedoras en todo lo que hacen.

Admito que no tengo experiencia en escribir este tipo de cosas. Pero como me han dicho, tratare de poner las cosas como las voy haciendo. La idea es compartir y difundir un poco mas este tipo de trabajos relacionados con los papeles pintados. En el internet hay muchos blogs y paginas relacionadas con este tema de los papeles marmolados y papeles al engrudo. Este blog se unira al grupo, pero con mi vision particular de las cosas.

En cada entrada tratare de mantener mas o menos una linea que sera la de dar algunos tips asociados a la realizacion de los papeles... Al fin y al cabo deben tomar en cuenta que este es un ARTE y como tal, en su desarrollo lo mas importante es la CREATIVIDAD!!

Ser uno mismo al momento de plasmar sobre el papel los trazos, hacer que fluya la propia energia y el propio pensamiento en ese momento. Buena parte de los papeles que aqui veran son creaciones mias, pero tambien hay papeles pintados por mi pero que son tentativos de reproducir algunas obras que he visto por alli. Claro: es como querer volver a pintar La Gioconda de Leonardo... Solo Leonardo la hizo asi como es! Es imposible que a mano alguien mas la haga exactamente igual. Aclaro que esos tentativos los hice con el proposito de "tomar practica" en la TECNICA, si eso mismo, porque si bien se trata de un arte, hace falta dominar tecnicas para poder realizarlos. Aqui usamos instrumentos para los trazos, materiales para colocar los pigmentos y agregados, y elaboramos mezclas de sustancias, por tanto, la tecnica esta alli... no podemos deshacernos de ella "Gracias a Dios"...

Donde hay tecnica hay tambien ensayos, pruebas... si! de eso tambien se trata! Elaborar estos tipos de papeles requiere EXPERIMENTAR Y PROBAR... que pasa si uso uno u otro material para las pinturas, con unos obtengo mas brillo que con otros, con unos obtengo colores mas claros, con otros mas nitidos... Que pasa si le agrego este tensoactivo al pigmento, el color flota!!!... cuanto agrego??... el color se "abre" mucho o poco!!!... Hoy el clima es humedo, o es seco, hace calor o esta fresco?... Muchas variables, todas hay que experimentarlas... Como resultado cada uno de nosotros lograra obtener su propio conjunto "ideal" de condiciones para poder obtener sus mejores resultados...

Muy importante: Hay que llevar una libreta de ANOTACIONES... los apuntes son escenciales. Asi podremos entender el camino que estamos recorriendo... anotemos palabras, frases, ideas, tiempos, temperaturas, pH, orden de colores, orden de pasos... nos sera util para poder "entendernos nosotros mismos" en nuestro trayecto personal...

Espero que de ahora en adelante tengamos muchos momentos de diversion y de relax, y que los colores, el pincel, el papel, nuestros sentimientos y la naturaleza sean testigos de esos momentos. Ya no se diga mas y empecemos nuestro camino.